Skip to main contentStep 1: Navigate to the Workflows Section
- Click on Workflows in the sidebar.
- Once on the Workflows page, click Create Workflow in the top-right corner.
- Enter a Workflow Name.
- Choose an Execution Mode:
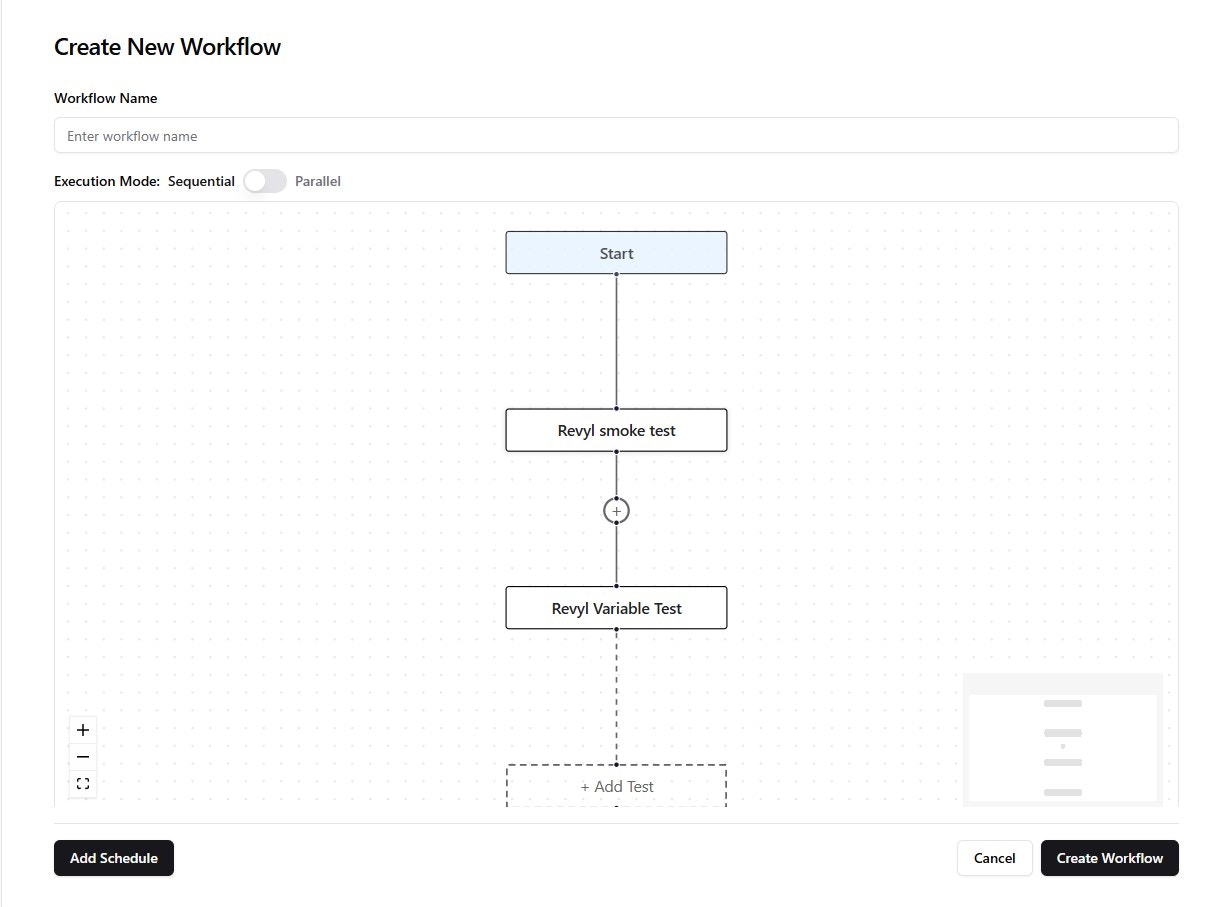
- Sequential: Runs tests one by one, waiting for each to complete before starting the next.
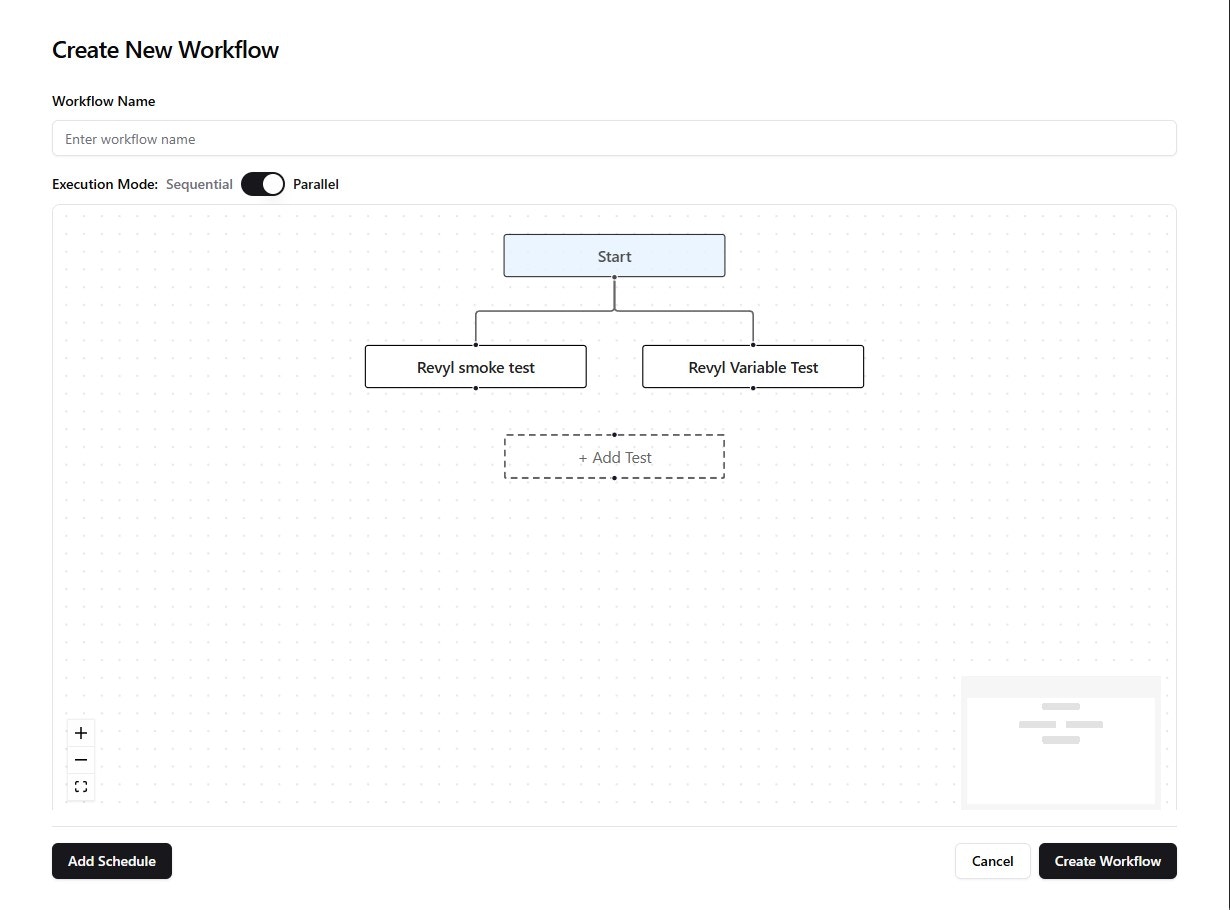
- Parallel: Runs tests simultaneously, useful when tests are dependent on each other.
Sequential Execution Example:
Parallel Execution Example:
Step 3: Add Tests to the Workflow
- Click + Add Test and select the required tests.
- Arrange them according to execution order.
Step 4: Add a Schedule
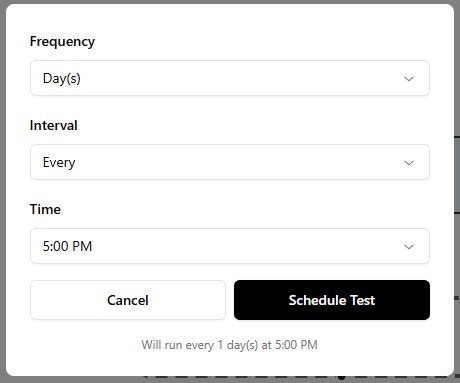
- Click Add Schedule to define when the workflow should run.
- Set:
- Frequency (e.g., Daily, Weekly).
- Interval (Every X days/weeks).
- Time of execution.
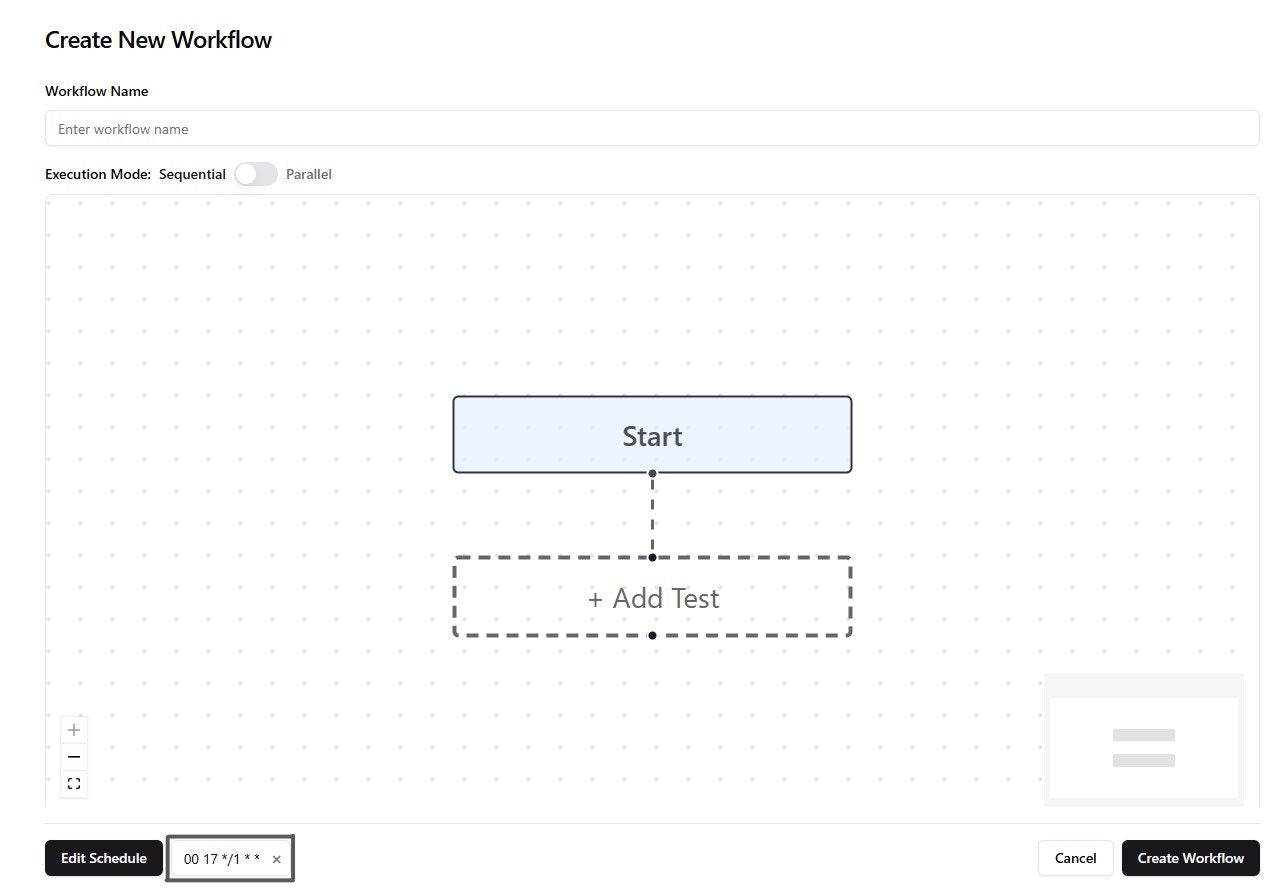
Step 5: Edit Cron Expression (Optional)
Once the schedule is created, you can manually modify the cron expression to fine-tune the execution time.
- Modify the cron expression as needed.
- Use Crontab Guru to verify or generate a valid cron expression.
Step 6: Save and Run the Workflow
- Click Create Workflow to finalize.
- Your workflow is now ready to run!
Now you’ve successfully created and scheduled a workflow in Revyl!